MORGAN RC
A division of www.morganmill.com
Screw Mount Set 8pc:
I like the servicing aspect of any design and especially the P3 F-16. This feature provides upgrade possibilities to the power system down the road. 8pc. in a set - SS screws included.
I like the servicing aspect of any design and especially the P3 F-16. This feature provides upgrade possibilities to the power system down the road. 8pc. in a set - SS screws included.

Made in the USA
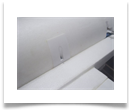
Position the top lip of the screw mount flush with the mating surface of the Belly Pan and mark. Take a Dremel with your choice of tip (I used a grinding stone tip) and make a recess for the screw indentation in the foam to receive the screw mount. I used White Gorilla glue as it will expand and backup the recess when attached to the fuse with included screws. Make sure there are no voids underneath the screw landing. Be careful with the Gorilla glue - don't use too much as it will creep out around the edge and make a mess. Canopy glue works well around the outside edge. Install the bottom fuse. Poke a hole through the flat on the screw mount and mark the upper fuse with the poker. Remove the bottom fuse and mortise in (make flush with mating rail) a small rectangle of lite-ply, Gorilla glue the lite-ply in place. Temporarily re-install the bottom fuse, mark the ply and drill (.040 or 1mm). Run a screw into the hole, back the screw out and run some thin CA in the hole to harden the threads in the ply. Let dry and then install the bottom fuse and wha-La! you are ready-5.
$15.95 8pc. set
Plus S&H
Plus S&H
PHASE 3 EF-16 PERFORMANCE PARTS
Cheater Hole Supports:
This provides support and screw mounts at the weak point in the fuse. A great addition to the screw mounts above. X4" Y1.375" Left and right pair.
This provides support and screw mounts at the weak point in the fuse. A great addition to the screw mounts above. X4" Y1.375" Left and right pair.
Ventral Fins:
Add stability in high speed turns, high angles of attack, prevent Tailirons from catching the tips as you flare the landing, look incredibly cool, and are scale. They also help prevent Dutch Roll enhancing directional stability. See research link #1 below. Which may add a few MPH. The Ventral Fins are very tough, made from .032 ABS black plastic and weigh in at 18 grams.
They will last for a good long while in rough service saving the bottom of your aircraft. They come with a flat black primer coat.
Installation is a snap - you can tape or glue them on before or after paint.
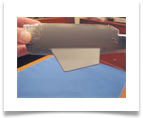
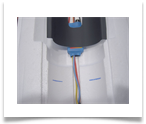
Install so as to match the upper rim of the conformal fin body with the top edge of your belly pan . Match the rear edge of the conformal fin body with the front edge of the servo opening making sure your servo arm clears in it's travel. Trim if necessary. This will align them with the slipstream and give you the correct angle and distance from the lip of the intake. The belly pan tapers towards the rear of the aircraft as does the fin body. Mark the overlap and cut a flush seam. (see picture 3).
$15.95 Pair
Plus S&H
Plus S&H
$25.95 Pair
Plus S&H
Plus S&H
The ESC Fairing:
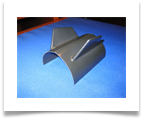
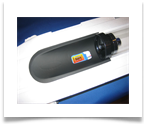
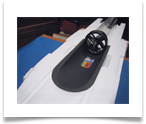
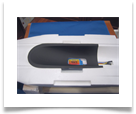
What could be done in hours is now possible in minutes. The ESC Fairing is a drop in aerodynamic enhancement for the interior of the duct in front of the fan. The ESC Fairing covers the wires and sharp edges in the motor compartment while creating laminar flow where itís needed the most in a ducted fan - right in front of the motor. This should gain you performance and speed across the wide range of motor and fan configurations possible with this aircraft.
Whether itís a stock motor on 3 cells or one of the high performance setups on 4 cells it will add speed and performance to an already outstanding performer at next to nothing in weight and installation time.
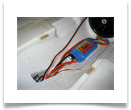
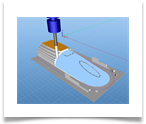
The mold was machined such that it provides suggested cut lines for an optional oval shaped hole at the rear of the battery compartment and necessary cooling hole cut lines for the stock ESC location.
Hot air from the battery compartment is exhausted through the rear hole and out around the ESC Fairing through the cheater holes. If you choose to close your cheater holes you can use the optional oval hole to exhaust hot air into the fan itself. See installation suggestions below.
The ESC Fairing will fit the stock fan shroud and any 70mm setup and is placed between the belly pan and the main fuselage. Used in conjunction with The Cheater Hole Supports it makes for a superb installation setup.
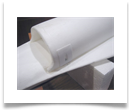
It is suggested that you glue or use a high quality tape at the front lip of the ESC Fairing so it will remain flush with the foam. (Remember FOD) Also secure the side flanges (CHS) and rear lip at the fan shroud. Made from .040 High Impact Polystyrene. (White)
ESC Fairing -
Stock/Mid Range Setup
Intake Lip plus 1"
Stock Power
Stock/Mid Range Setup
Intake Lip plus 1"
Stock Power
$12.95
Plus S&H
Plus S&H
ESC Fairing - 70mm Setup
Intake Lip plus 3"
High Power
Intake Lip plus 3"
High Power

$15.95
Plus S&H
Plus S&H


Nose Cone Phase 3 EF-16:
The Nose Cone for the Phase 3 EF-16 is made from white .040" High Impact Polystyrene - much thicker than stock cone. It's finish cut, ready to paint and install on your Jet.
The Nose Cone for the Phase 3 EF-16 is made from white .040" High Impact Polystyrene - much thicker than stock cone. It's finish cut, ready to paint and install on your Jet.
$15.95
Plus S&H
Plus S&H

